Skip to content
Psi & Hose

Guides

How to set an air compressor pressure switch

The pressure switch decides when the pump starts and stops. The regulator decides what reaches your tool. Nine times out of ten the thing you want to change is the second one.

By Ryder M.Last updated Published
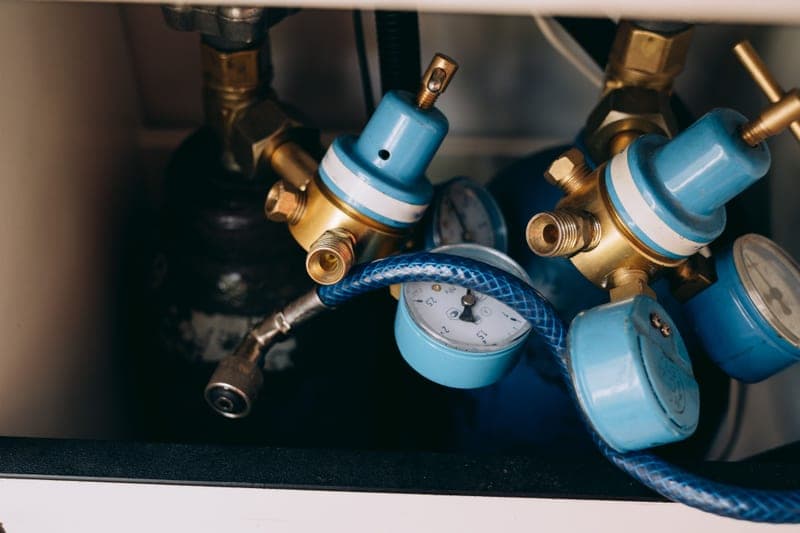
A pressure gauge and regulator on an air compressor manifold

Some links on this page are affiliate links. If you buy through one, Magoo Media Group earns a commission from the retailer at no extra cost to you. It never changes which product we rank first - how this site is funded.

Read this first

The short answer, and the part people get wrong

To set a pressure switch: unplug the compressor, drain the tank to zero, remove the switch cover, and turn the single large central screw - clockwise raises the cut-out pressure, counter-clockwise lowers it, usually in the region of a few PSI per quarter turn. Then refill and read the gauge to confirm. Never set cut-out above the tank's rated maximum pressure, and never adjust the safety relief valve.

Before you do any of that, check whether you actually have a pressure-switch problem. The switch controls when the pump runs: it cuts in at a lower pressure, builds to a higher cut-out pressure, and stops. The regulator is a separate device that throttles tank pressure down to whatever your tool needs. If your nailer is driving brads too deep, or your spray gun is atomizing badly, or a tool feels weak, that is the regulator - and the switch is not involved.

The honest reason this distinction matters: on almost every consumer compressor the switch is factory-set at or just below the tank's rated ceiling, which means there is no headroom to raise it. The only legitimate adjustments are lowering cut-out, or restoring a switch that has drifted below where it should be.

Two things never to adjust

The safety relief valve is set at the factory to protect the tank and is not a tuning point - if it is venting, the switch is set too high or has failed, and the valve is doing its job. And the tank's rated maximum pressure is a hard ceiling: across our roster those ratings run from 120 to 200 PSI, and the cut-out setting must stay below the one printed on your machine.

The three numbers

Cut-out, cut-in and differential

Cut-out is the pressure at which the pump stops. It is the highest number your gauge reaches, and it is what the large central screw on the switch sets. Cut-in is the pressure at which the pump starts again as you use air. Differential is the gap between them, and on switches that expose it, a second smaller screw sets it.

The gap is not arbitrary. A narrow differential means the pump restarts sooner and runs more often in short cycles; a wide differential means fewer, longer runs. Short cycling is harder on a motor than long runs, which is why manufacturers set the differential fairly wide and why narrowing it is rarely an improvement.

You can read real factory ranges off the machines that publish them. One 8-gallon unit in our registry publishes a 60-second recovery from 90 to 120 PSI; a 10-gallon unit publishes a 25-second recovery from 95 to 125 PSI. Those recovery figures are effectively the manufacturer stating its own cut-in and cut-out points, and they show what a normal differential looks like: roughly 30 PSI.

Published recovery ranges, which reveal factory switch settings
CompressorPublished recoveryImplied bandTank rating
California Air Tools 8010A60 s from 90 to 120 PSI~30 PSI differential120 PSI max
California Air Tools 10020C25 s from 95 to 125 PSI~30 PSI differential125 PSI max
Husky C201HAbout 7 minutes to fill from emptyNot published175 PSI max
Senco PC1010128 second pump-up timeNot published125 PSI max

Recovery and pump-up figures are manufacturer-published. The differential column is arithmetic on those published numbers, not a separate claim.

Do it like this

The procedure, in order

  1. 01Decide whether you need the switch at all. If the problem is how a tool behaves, adjust the regulator and stop here. The switch only changes when the pump runs.
  2. 02Unplug the compressor at the wall. Not the switch lever - the plug. The switch is a line-voltage device and you are about to open its cover.
  3. 03Drain the tank to zero. Open the drain valve at the bottom and leave it open until the gauge reads zero and air stops escaping. Adjusting a switch on a pressurized tank is the mistake that turns this into an incident.
  4. 04Note the tank's rated maximum pressure. It is stamped or printed on the tank or the data plate. Whatever you do next, the cut-out setting must end up below this number.
  5. 05Remove the switch cover and find the adjustment screw. On most consumer switches there is one large screw or nut in the center, often under a plastic cap. Some switches add a second, smaller differential screw; many do not.
  6. 06Turn it in small increments. Clockwise raises cut-out, counter-clockwise lowers it. Work in quarter turns, not full turns - the thread is coarse relative to the pressure range.
  7. 07Refit the cover, close the drain, plug in and run the compressor to cut-out. Read the gauge. Repeat the adjustment if needed, depressurizing each time.
  8. 08Confirm the pump cuts in and out cleanly through two full cycles. A switch that hunts, chatters or fails to cut out is a switch to replace, not to adjust further.

If it will not cut out at all

That is a different problem and it is usually not the switch. A leak downstream, a drain valve left open or a tool drawing air will all stop a compressor reaching cut-out, and all three are free to check. Work through the diagnosis order on our dedicated page before you open anything.

What to look for

What to look for in a regulator, since that is usually the real answer

Flow capacity first. A regulator that flows less than your compressor produces becomes the restriction in your system, and you will never see the air you paid for. The unit we recommend publishes 53 SCFM at 3/8-inch NPT, which is far beyond anything in our compressor roster - that headroom is the point.

A real gauge and a metal bowl second. A 0-150 PSI gauge you can actually read is the difference between setting pressure and guessing at it, and a metal bowl survives a garage in a way a polycarbonate one does not.

Then check the pressure ratings against your machine, both of them. A regulator has a maximum supply pressure and a maximum operating pressure, and they are different numbers. The combined filter-regulator below publishes 250 PSI supply but 150 PSI operating, which means it cannot sit directly on a 175 PSI tank outlet - a detail that is easy to miss and expensive to discover.

Finally, decide how many stages you need. One 10-micron stage catches water and rust, which is enough for nailing, inflation and impacts. It does not catch oil aerosol or sub-micron mist, so if you spray paint or clear coat you need a 0.1-micron mist separator stage as well.

Ranked

The parts worth buying

Quick picks

#ProductBest forScorePrice
1
A wall-mounted compressed air filter and regulator with a pressure gauge
PneumaticPlus SAW300 filter / regulator3/8" NPT / 53 SCFM / 10 micron53 SCFM, 10 micron, with a real gauge and a metal bowl. The single most useful small purchase in a garage air system.
One combined water trap and regulator at the wall5.3/10★★★☆☆

#ad Disclosure - we do not publish prices we cannot verify

2
A three-stage compressed air filtration and regulation assembly mounted on a wall
PneumaticPlus SAU430 three-stage1/2" NPT / 10 micron particulate filter / 0.1 micron mist separator10 micron, then 0.1 micron mist separator, then regulator. The honest minimum before a spray gun.
Spraying paint or clear coat from a garage compressor5.6/10★★★☆☆

#ad Disclosure - we do not publish prices we cannot verify

3
A composite-bodied safety quick-connect air coupler held in a hand
Prevost ARO-style safety coupler1/4" FNPT / ARO-style safety / 34 SCFM at 100 PSIVents the downstream line before it releases the plug, so the hose cannot whip. 34 SCFM at 100 PSI.
Any hose you disconnect while it is still pressurized6.7/10★★★☆☆

#ad Disclosure - we do not publish prices we cannot verify

Scores are computed from manufacturer-published specs by the rubric on our methodology page. Nothing here has been bench-tested, and we do not publish prices we cannot verify.

Pick 1 - PneumaticPlus SAW300-N03BG-MEP

5.3/10★★★☆☆

PneumaticPlus SAW300 filter / regulator

Best for: One combined water trap and regulator at the wall

Verdict

53 SCFM, 10 micron, with a real gauge and a metal bowl. The single most useful small purchase in a garage air system.

What it does well

  • 53 SCFM at 3/8-inch NPT - it will not restrict any compressor on this site
  • 10 micron element plus a regulator in one piggyback body, so one mount does both jobs
  • Metal bowl and a 0-150 PSI gauge, with bracket included

What it will not do

  • 10 micron catches water and rust, NOT oil aerosol - it is not enough on its own for paint
  • Max operating pressure is 150 PSI, so it cannot sit upstream of a 175 PSI tank outlet
How this 5.3 was calculated
MetricScoreWeightBasis
Pressure headroom7.140%250 PSI rating, on a 125-300 PSI scale
Flow capacity2.240%53 SCFM, on a 40-100 SCFM scale
Spec transparency8.020%6 published specification figures
A wall-mounted compressed air filter and regulator with a pressure gauge

Licensed stock photo - illustrative of the category, not a photo of this unit

#ad Disclosure - we do not publish prices we cannot verify

Published specs

PneumaticPlus SAW300 filter / regulator published specifications
Port size3/8" NPT
Flow53 SCFM
Filtration10 micron
Max supply pressure250 PSI
Max operating pressure150 PSI
Gauge0-150 PSI, bracket included

Source: PneumaticPlus SAW300 filter/regulator - product specifications

Pick 2 - PneumaticPlus SAU430-N04G

5.6/10★★★☆☆

PneumaticPlus SAU430 three-stage

Best for: Spraying paint or clear coat from a garage compressor

Verdict

10 micron, then 0.1 micron mist separator, then regulator. The honest minimum before a spray gun.

What it does well

  • 0.1 micron mist separator stage is the one that actually removes oil aerosol and sub-micron mist
  • Three stages in one modular body with a bracket and gauge
  • 1/2" NPT, so it is not the restriction in a spray setup

What it will not do

  • Three elements to buy and replace instead of one
  • Does not dry air the way a refrigerated dryer or desiccant column does - it separates, it does not chill
How this 5.6 was calculated
MetricScoreWeightBasis
Pressure headroom5.040%No pressure rating published - scored a neutral 5
Flow capacity6.040%Flow not published for this class - scored a 6, which is what a correctly sized hose or fitting does not restrict
Spec transparency6.020%5 published specification figures
A three-stage compressed air filtration and regulation assembly mounted on a wall

Licensed stock photo - illustrative of the category, not a photo of this unit

#ad Disclosure - we do not publish prices we cannot verify

Published specs

PneumaticPlus SAU430 three-stage published specifications
Port size1/2" NPT
Stage 110 micron particulate filter
Stage 20.1 micron mist separator
Stage 3Pressure regulator
IncludedBracket and gauge

Source: PneumaticPlus SAU430 three-stage air drying system - product specifications

Pick 3 - Prevost 081201 (ARO-style, 1/4 in FNPT)

6.7/10★★★☆☆

Prevost ARO-style safety coupler

Best for: Any hose you disconnect while it is still pressurized

Verdict

Vents the downstream line before it releases the plug, so the hose cannot whip. 34 SCFM at 100 PSI.

What it does well

  • Two-stage push-button purges air from the hose and tool before disconnection - no hose whip
  • 34 SCFM at 100 PSI, so the safety mechanism does not cost you flow
  • Non-marring impact-resistant composite body with a 3-year manufacturer warranty

What it will not do

  • 174 PSI maximum operating pressure - it belongs downstream of the regulator, not on a 175 PSI tank outlet
  • Costs several times a plain brass coupler, for a benefit you only notice the day it matters
How this 6.7 was calculated
MetricScoreWeightBasis
Pressure headroom2.840%174 PSI rating, on a 125-300 PSI scale
Flow capacity10.040%34100 SCFM, on a 40-100 SCFM scale
Spec transparency8.020%6 published specification figures
A composite-bodied safety quick-connect air coupler held in a hand

Licensed stock photo - illustrative of the category, not a photo of this unit

#ad Disclosure - we do not publish prices we cannot verify

Published specs

Prevost ARO-style safety coupler published specifications
Thread1/4" FNPT
PatternARO-style safety
Air flow34 SCFM at 100 PSI
Max operating pressure174 PSI
BodyNon-marring impact-resistant composite
Warranty3 years (manufacturer)

Source: Prevost ARO-style safety coupler (081201) - distributor specification listing

The counterintuitive bit

Why lowering cut-out is often the smart move

Everyone who searches this wants more pressure. For most garages, less is the better setting. A pump that stops at 120 PSI instead of 150 runs shorter cycles, gets less hot and spends less of its life at the top of its range - and if every tool you own is rated at 90 PSI, the stored pressure above about 120 is doing nothing except being stored.

The exception is burst work on a small tank. Stored air scales with pressure, so a 6-gallon tank at 165 PSI holds roughly 10% more usable air than the same tank at 150. If you break lug nuts with a 2.6 CFM compressor, that 10% is the difference between one more nut and waiting for the pump. That is the single case where the top of the range earns its keep.

What lowering cut-out never does is reduce flow. CFM at 90 PSI is set by the pump, not by the switch, so a tool that your compressor cannot sustain will not become sustainable at any switch setting. If that is the problem you are trying to solve, the answer is a bigger pump.

FAQ

Questions people actually ask

How do you adjust an air compressor pressure switch?

Unplug the compressor, drain the tank to zero, remove the switch cover and turn the large central screw in quarter turns - clockwise to raise cut-out, counter-clockwise to lower it. Refit, refill and read the gauge to confirm. Never set cut-out above the tank's rated maximum, and never adjust the safety relief valve.

What is the difference between the pressure switch and the regulator?

The pressure switch decides when the pump runs - it cuts in at a low pressure and cuts out at a high one. The regulator throttles tank pressure down to what your tool needs. If a tool is behaving badly, it is the regulator. If the pump is running at the wrong times, it is the switch.

What should cut-in and cut-out pressure be set to?

Follow your machine's data plate, and keep cut-out below the tank's rated maximum. For scale, two units in our registry publish their own working bands: one recovers from 90 to 120 PSI, the other from 95 to 125 PSI - roughly a 30 PSI differential in both cases.

Can I increase my air compressor's pressure?

Usually not meaningfully. On most consumer compressors the switch is factory-set at or just below the tank's rated ceiling, so there is no headroom. And raising pressure does not raise flow - CFM at 90 PSI is set by the pump, so a tool your compressor cannot sustain will not become sustainable at a higher setting.

Why does my safety valve keep venting?

Because the cut-out setting is too high or the switch has failed, and the valve is doing exactly what it exists to do. Lower the cut-out or replace the switch. Never adjust or restrain the relief valve itself - it is the tank's last line of protection and is set at the factory.

Is it safe to adjust a pressure switch yourself?

It is routine owner maintenance provided you unplug the compressor at the wall and fully drain the tank first, and provided you keep cut-out below the tank's rated pressure. If the switch chatters, hunts or will not cut out after adjustment, replace it rather than continuing to adjust it.

Sources

Where these numbers come from

Accessed September 2026. If a figure on this page does not match the manufacturer's current sheet, tell us at contact@psiandhose.com and we will correct and date the change - see our editorial policy.

Read next