Skip to content
Psi & Hose

Guides

How to set an air compressor regulator

Almost everyone sets a regulator wrong in the same way: they adjust it with the tool idle and then wonder why the pressure sags the moment they pull the trigger. Setting it under flow is the whole technique.

By Ryder M.Last updated Published
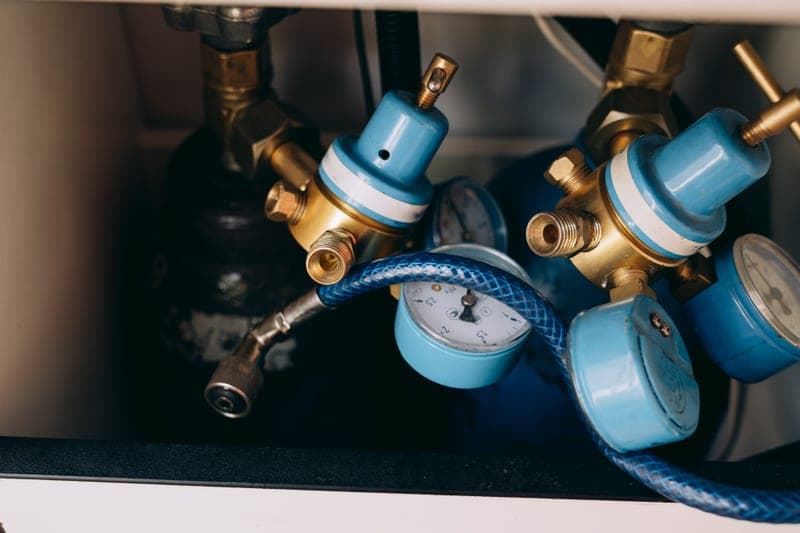
A wall-mounted compressed air filter and regulator with a pressure gauge

Some links on this page are affiliate links. If you buy through one, Magoo Media Group earns a commission from the retailer at no extra cost to you. It never changes which product we rank first - how this site is funded.

Read this first

The short answer

Set the regulator while air is actually flowing. Connect the tool, run it, and adjust the knob until the gauge reads the pressure your tool wants while it is working. A regulator set to 90 PSI with the tool idle will frequently show 60 or 70 under load, because the pressure drop you are trying to compensate for only exists when air is moving.

That is the single change that fixes most pressure complaints, and it is the one step almost no manual spells out. The gauge on your regulator reads what is downstream of it, and downstream pressure is a function of flow. Static readings tell you about a system that is not doing anything.

The second half of the answer is knowing what number to aim at. Nailers want 70 to 120 PSI and will drive fine at the low end on softwood. Most automotive air tools are specified at 90 PSI, which is why that figure appears on every spec sheet. Spray guns vary by gun and the gun's own documentation is the authority. Inflation wants whatever the tire placard says, with headroom above it at the regulator.

Two gauges, two different jobs

The tank gauge shows stored pressure - typically 120 to 200 PSI depending on your machine's cut-out. The regulator gauge shows what the hose and tool actually see. They are supposed to disagree. If you are reading the tank gauge and wondering why your nailer is misfiring at 150 PSI, you are reading the wrong dial.

Before you buy one

What to look for in a regulator

Two specifications decide whether a regulator helps or hurts. The first is flow capacity, in SCFM: a regulator that cannot pass the air your tool wants becomes the restriction, and you will chase a pressure problem you installed yourself. Our PneumaticPlus SAW300 publishes 53 SCFM on 3/8-inch NPT, which is more than any compressor on this site delivers, so it cannot be the bottleneck.

The second is pressure rating, and it is where people get caught. The SAW300 publishes a 250 PSI maximum supply pressure but a 150 PSI maximum operating pressure - which means it cannot sit directly on the outlet of a 175 PSI tank. Check your machine's cut-out pressure against the regulator's operating maximum before you plumb it in.

Beyond that, prefer a combined filter-regulator over a bare regulator. A compressor makes wet air, the water has to come out somewhere, and one wall mount doing both jobs is simpler than two. For spraying, you want three stages - 10 micron particulate, a 0.1 micron mist separator, then the regulator - which is what the PneumaticPlus SAU430 is on 1/2-inch NPT.

The picks

What to fit at the wall

Quick picks

#ProductBest forScorePrice
1
A wall-mounted compressed air filter and regulator with a pressure gauge
PneumaticPlus SAW300 filter / regulator3/8" NPT / 53 SCFM / 10 micron53 SCFM, 10 micron, with a real gauge and a metal bowl. The single most useful small purchase in a garage air system.
One combined water trap and regulator at the wall5.3/10★★★☆☆

#ad Disclosure - we do not publish prices we cannot verify

2
A three-stage compressed air filtration and regulation assembly mounted on a wall
PneumaticPlus SAU430 three-stage1/2" NPT / 10 micron particulate filter / 0.1 micron mist separator10 micron, then 0.1 micron mist separator, then regulator. The honest minimum before a spray gun.
Spraying paint or clear coat from a garage compressor5.6/10★★★☆☆

#ad Disclosure - we do not publish prices we cannot verify

3
Color-coded quick-connect air couplers and plugs laid out on a bench
Milton ColorFit HighFlowPro V-Style set1/4" NPT / V-Style (HighFlowPro) / Up to 74 SCFMUp to 74 SCFM through a 1/4-inch body, and color-coded so you cannot cross-connect two patterns.
High-volume, low-pressure work: spray guns, blast cabinets, big blow guns7.5/10★★★★☆

#ad Disclosure - we do not publish prices we cannot verify

Scores are computed from manufacturer-published specs by the rubric on our methodology page. Nothing here has been bench-tested, and we do not publish prices we cannot verify.

Pick 1 - PneumaticPlus SAW300-N03BG-MEP

5.3/10★★★☆☆

PneumaticPlus SAW300 filter / regulator

Best for: One combined water trap and regulator at the wall

Verdict

53 SCFM, 10 micron, with a real gauge and a metal bowl. The single most useful small purchase in a garage air system.

What it does well

  • 53 SCFM at 3/8-inch NPT - it will not restrict any compressor on this site
  • 10 micron element plus a regulator in one piggyback body, so one mount does both jobs
  • Metal bowl and a 0-150 PSI gauge, with bracket included

What it will not do

  • 10 micron catches water and rust, NOT oil aerosol - it is not enough on its own for paint
  • Max operating pressure is 150 PSI, so it cannot sit upstream of a 175 PSI tank outlet
How this 5.3 was calculated
MetricScoreWeightBasis
Pressure headroom7.140%250 PSI rating, on a 125-300 PSI scale
Flow capacity2.240%53 SCFM, on a 40-100 SCFM scale
Spec transparency8.020%6 published specification figures
A wall-mounted compressed air filter and regulator with a pressure gauge

Licensed stock photo - illustrative of the category, not a photo of this unit

#ad Disclosure - we do not publish prices we cannot verify

Published specs

PneumaticPlus SAW300 filter / regulator published specifications
Port size3/8" NPT
Flow53 SCFM
Filtration10 micron
Max supply pressure250 PSI
Max operating pressure150 PSI
Gauge0-150 PSI, bracket included

Source: PneumaticPlus SAW300 filter/regulator - product specifications

Pick 2 - PneumaticPlus SAU430-N04G

5.6/10★★★☆☆

PneumaticPlus SAU430 three-stage

Best for: Spraying paint or clear coat from a garage compressor

Verdict

10 micron, then 0.1 micron mist separator, then regulator. The honest minimum before a spray gun.

What it does well

  • 0.1 micron mist separator stage is the one that actually removes oil aerosol and sub-micron mist
  • Three stages in one modular body with a bracket and gauge
  • 1/2" NPT, so it is not the restriction in a spray setup

What it will not do

  • Three elements to buy and replace instead of one
  • Does not dry air the way a refrigerated dryer or desiccant column does - it separates, it does not chill
How this 5.6 was calculated
MetricScoreWeightBasis
Pressure headroom5.040%No pressure rating published - scored a neutral 5
Flow capacity6.040%Flow not published for this class - scored a 6, which is what a correctly sized hose or fitting does not restrict
Spec transparency6.020%5 published specification figures
A three-stage compressed air filtration and regulation assembly mounted on a wall

Licensed stock photo - illustrative of the category, not a photo of this unit

#ad Disclosure - we do not publish prices we cannot verify

Published specs

PneumaticPlus SAU430 three-stage published specifications
Port size1/2" NPT
Stage 110 micron particulate filter
Stage 20.1 micron mist separator
Stage 3Pressure regulator
IncludedBracket and gauge

Source: PneumaticPlus SAU430 three-stage air drying system - product specifications

Pick 3 - Milton ColorFit HighFlowPro V-Style

7.5/10★★★★☆

Milton ColorFit HighFlowPro V-Style set

Best for: High-volume, low-pressure work: spray guns, blast cabinets, big blow guns

Verdict

Up to 74 SCFM through a 1/4-inch body, and color-coded so you cannot cross-connect two patterns.

What it does well

  • Up to 74 SCFM at 300 PSI maximum inlet - nearly double a standard 1/4-inch M-STYLE coupler
  • Color coding is the practical fix for the incompatible-pattern problem: you can see the pattern across the garage
  • Push-type sleeve release, and compatible with other V-style couplers and plugs

What it will not do

  • V-style is a different pattern again - adopting it means converting every tool, not mixing it in
  • The high-flow advantage only appears on tools that actually move that much air
How this 7.5 was calculated
MetricScoreWeightBasis
Pressure headroom10.040%300 PSI rating, on a 125-300 PSI scale
Flow capacity5.740%74 SCFM, on a 40-100 SCFM scale
Spec transparency6.020%5 published specification figures
Color-coded quick-connect air couplers and plugs laid out on a bench

Licensed stock photo - illustrative of the category, not a photo of this unit

#ad Disclosure - we do not publish prices we cannot verify

Published specs

Milton ColorFit HighFlowPro V-Style set published specifications
Thread1/4" NPT
PatternV-Style (HighFlowPro)
Air flowUp to 74 SCFM
Max inlet pressure300 PSI
ReleasePush-type sleeve

Source: Milton ColorFit HighFlowPro V-Style coupler and plug set - product specifications

Do it once

The procedure, step by step

  1. 01Let the compressor reach cut-out and stop. You want the system at full stored pressure before you set anything, so the tank is not the variable.
  2. 02Drain the tank if you have not today. Water in the bottom of the tank is water on its way into the regulator bowl and then your tool. Ten seconds, every session.
  3. 03Connect the hose and the tool you are about to use. The regulator setting is specific to the tool and the hose on the end of it - a different hose length or diameter changes the answer.
  4. 04Back the knob off until the gauge reads low. Most regulators adjust more accurately going up than coming down, because the diaphragm has to vent to reduce pressure. Start below your target and approach it from underneath.
  5. 05Run the tool, and adjust while it is running. Fire the nailer into scrap, hold the blow gun open, pull the ratchet trigger. Turn the knob up until the gauge holds your target number under that load.
  6. 06Lock the knob if it has a lock ring, and note the setting. A regulator that drifts because the knob gets knocked is the second most common cause of a tool that worked yesterday and does not today.
  7. 07Re-check at the tool if you can. A gauge at the wall and a gauge at the tool can differ by a lot across 50 feet of narrow hose, and the one at the tool is the one that matters.

The numbers

What pressure each tool class wants

These working pressures come from the same cited dataset that drives our CFM chart and calculator, so they agree with every other page on this site. Note that the pressure a tool wants and the air volume it wants are independent specifications - meeting one does not get you the other, which is the most common confusion in this whole category.

Published air demand at 90 PSI
ToolCFM @ 90 PSIAt loadDutyWhat the number means
Brad nailer, 18 gauge0.5-BurstThe most forgiving air tool there is. A nailer draws air only at the instant it fires, so almost any tank covers it. That is why a 1-gallon compressor is a genuinely complete tool for trim work rather than a compromise.
Framing nailer, 21 or 30 degree2.5-BurstEngineering ToolBox lists 2.5 CFM for a framing nailer on a 25% load factor. Metabo HPT publishes 0.09 SCFM at 100 PSI for the NR90AES1 on a per-cycle basis. The two describe the same tool at different firing rates, which is exactly why one CFM number for a nailer is misleading: nail pace sets the demand, not the badge on the tool.
Upholstery / crown stapler2-BurstEngineering ToolBox lists 2 CFM for an upholstery stapler, measured at 30 PSI. Low pressure means low demand, and a small tank keeps up easily.
Impact wrench, 1/2"4 - 522BurstThe most misunderstood number on this chart. Ingersoll Rand publishes 4.2 CFM average for the 231C and 22 CFM at load. The average assumes you hold the trigger for a second or two at a time. A 6-gallon pancake at 2.6 CFM does break lug nuts; it simply cannot keep the trigger down.
Tire inflation2-IntermittentBoth references agree on 2 CFM. Note the working pressure: you are filling to 35 PSI, not 90, so almost every compressor delivers more than it needs to. Tires are why so many people overbuy - the job is easy and the marketing is not.
Blow gun / dusting gun2.5 - 3-IntermittentIngersoll Rand lists 2.5 CFM, Engineering ToolBox 3. Held open continuously - clearing a sprinkler line, blowing out a filter - a blow gun empties a 6-gallon tank surprisingly fast.
Paint spray gun, production / HVLP8 - 7-ContinuousIngersoll Rand lists 8 CFM for production spraying; Engineering ToolBox gives 3-7 CFM for small hand-operated sprayers. Check the gun's own spec sheet - HVLP demand varies more than any other tool class on this chart.
Sandblaster / blast cabinetNot published-ContinuousEngineering ToolBox gives 6-400 CFM - a range so wide it is really a statement that the nozzle orifice sets the demand, not the cabinet. A small siphon gun sits near the bottom; a pressure pot with a 1/4-inch nozzle is industrial. We publish no single number because no source does.

Where two references publish different figures, both are shown rather than averaged into a number nobody published. Primary sources: Ingersoll Rand air consumption chart, Engineering ToolBox air tool consumption, and per-tool manufacturer specifications.

Diagnosing a sag

The regulator is not the problem, usually

If the regulator gauge holds your number under load but the tool still feels weak, the regulator has done its job and the restriction is elsewhere. Work downstream: hose diameter first, then couplers, then the tool itself.

Hose diameter is the usual culprit. A hose is a restriction and the loss grows sharply as diameter falls and length rises, which is why a 2.6 CFM compressor on 50 feet of 1/4-inch hose delivers noticeably less at the tool than the same machine on 3/8-inch. Ingersoll Rand specifies a 3/8-inch minimum hose ID for its 231C impact wrench for exactly this reason.

Couplers are the next suspect and the easiest to ignore because they look identical. A standard 1/4-inch M-STYLE coupler publishes 40 SCFM, which is ample for anything here; cheap unbranded fittings frequently publish nothing at all, and a high-flow V-style set exists precisely because the standard pattern can throttle a hungry tool. If your air path has five couplers in it, you have five restrictions.

And if the regulator gauge itself sags under load, the compressor is the constraint rather than the plumbing. That is a CFM shortfall, not a setting, and no adjustment fixes it.

Being honest

Mistakes that look like regulator faults

  • Reading the tank gauge instead of the regulator gauge. They are supposed to disagree, and one of them is not the pressure your tool sees.
  • Setting the regulator at rest. The pressure drop you are compensating for only exists under flow, so a static setting is a setting for a system doing nothing.
  • Running the regulator wide open and calling it 'full pressure'. Feeding a nailer rated to 120 PSI from a 175 PSI tank with no regulation is how you damage seals and drive nails through trim.
  • Mounting the filter after the regulator when its pressure rating says otherwise. A 125 PSI final filter on a 175 PSI tank outlet is a part installed outside its rating.
  • Leaving the bowl full. A filter bowl that has not been drained is a filter that has stopped filtering, and on a humid day it fills faster than you expect.
  • Chasing a sag with the knob. If the gauge will not hold the number under load, turning it further up does not create air the compressor is not making.

FAQ

Questions people actually ask

How do I set an air compressor regulator?

With air flowing. Connect the tool, run it, and turn the knob up until the regulator gauge holds your target pressure while the tool is working. A setting made with the tool idle will sag the moment you pull the trigger, because the pressure drop you are compensating for only exists under flow.

What PSI should I set my air compressor to?

To the tool, not to the compressor. Most automotive air tools are specified at 90 PSI. Nailers operate across 70 to 120 PSI and drive fine at the low end in softwood. Spray guns vary by gun and the gun's own documentation is the authority. Inflation wants the tire placard figure with headroom above it at the regulator.

Why does my regulator pressure drop when I use a tool?

Because pressure drop is a function of flow. Some drop is normal and is exactly what you compensate for by setting under load. If the gauge sags far below your setting, the restriction is downstream - hose diameter and couplers first - or the compressor cannot supply the CFM the tool is drawing.

What is the difference between the two gauges on my compressor?

One shows tank pressure, which is stored air at 120 to 200 PSI depending on your machine's cut-out. The other shows regulated outlet pressure, which is what the hose and tool actually see. They disagree by design.

Can I leave my regulator at maximum?

You can, and you should not. Feeding a tool rated to 120 PSI from a 175 PSI tank with no regulation stresses seals and, on a nailer, drives fasteners deeper than you want. The regulator is also where you set the pressure a spray gun needs, which is never maximum.

Should the filter go before or after the regulator?

Particulate and water separation go before, so the regulator sees clean air. A fine final-stage filter often has a lower pressure rating than the tank - 125 PSI on one in our roster - which means it must sit after the regulator. Check the part's own rating rather than following a rule of thumb.

Sources

Where these numbers come from

Accessed September 2026. If a figure on this page does not match the manufacturer's current sheet, tell us at contact@psiandhose.com and we will correct and date the change - see our editorial policy.

Read next